Start Guide to our app
Enter your email address and click on Create account.
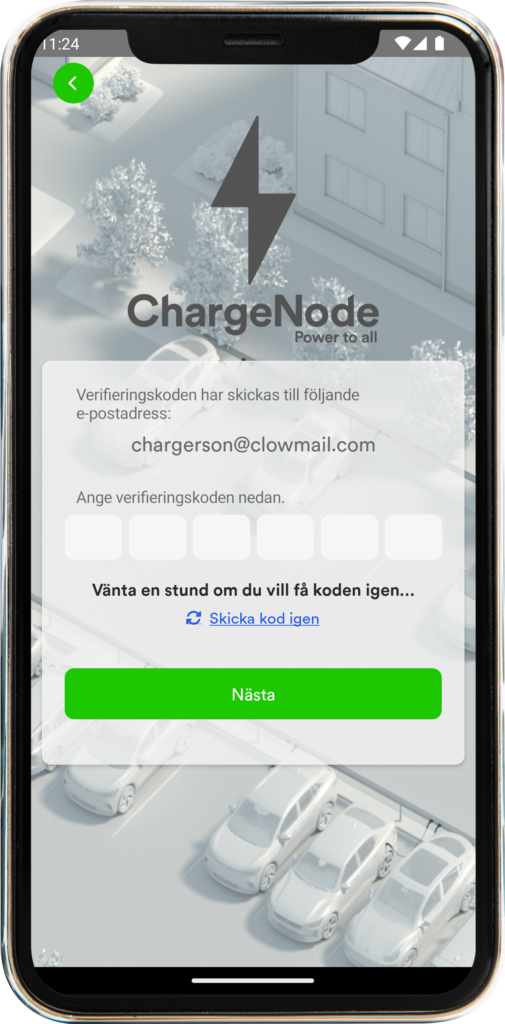
We will send out a verification code to the email address you have provided. (If you want the code sent to you again, you will have to wait 30 seconds between times. Each time, a new code will be generated.) If you have not received the code, check your spam folder, it may have ended up there.
Fill in the verification code and press Next.
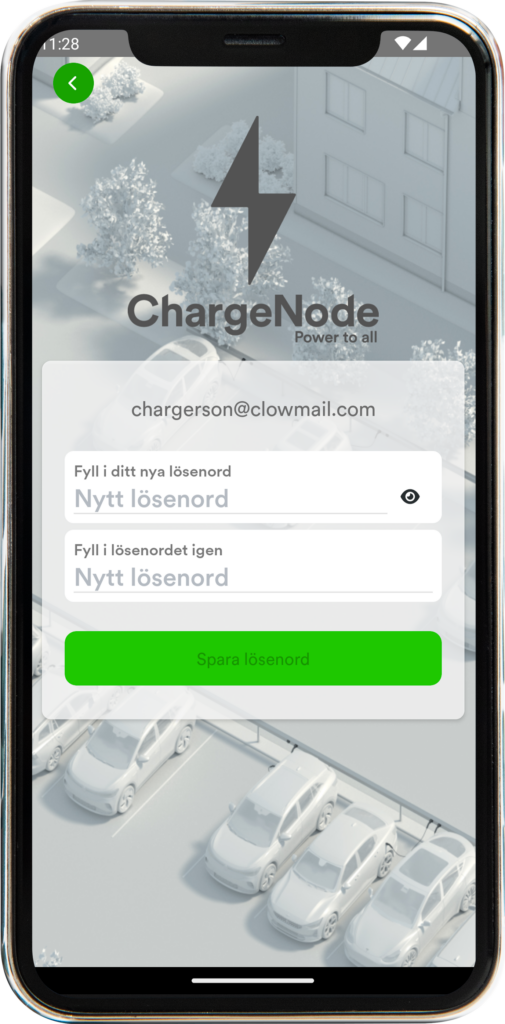
After entering the code, they will be asked to enter your desired password. Press Save password.
We will now create your account and you can fill in your details.
Then press Save.
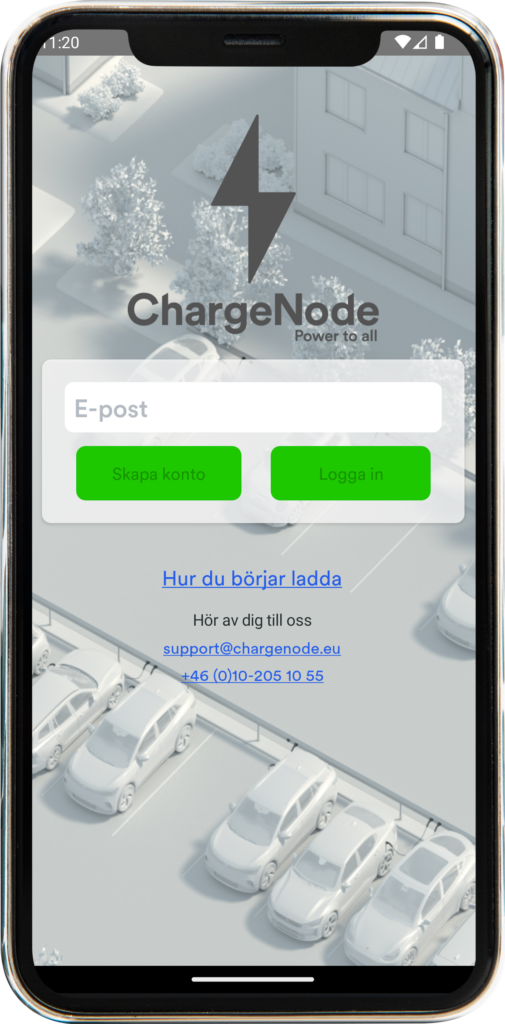
Enter your e-mail address and click on Log in.
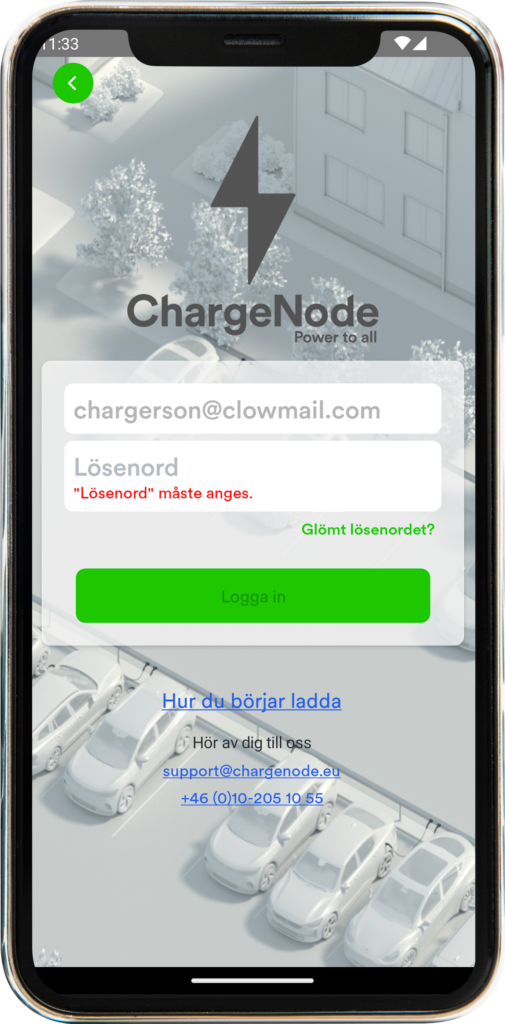
Enter the password and press Log in again. You are now logged in!
Have you forgotten your password? Press Login and “Forgot your password” will appear. The flow for changing your password is the same as for creating a new account.

To start a charge, press Select.
Select the area that appears in the list or search for the area’s name or area code.
If you prefer to scan the QR code at the socket, press the button with the QR code.
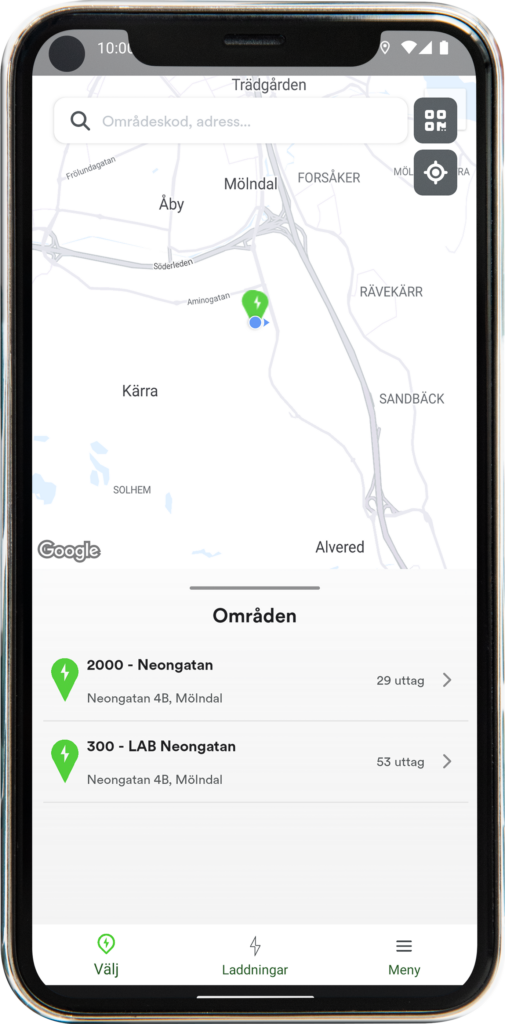
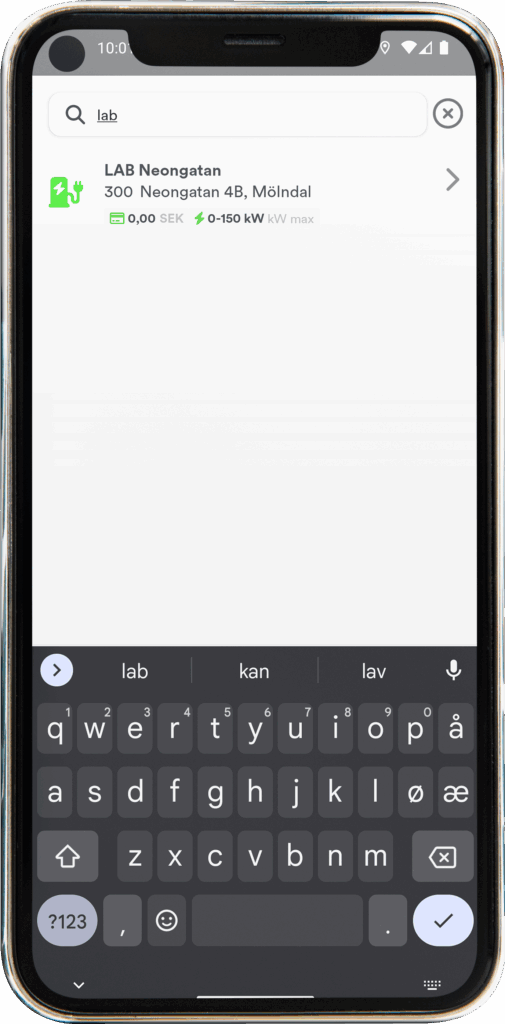
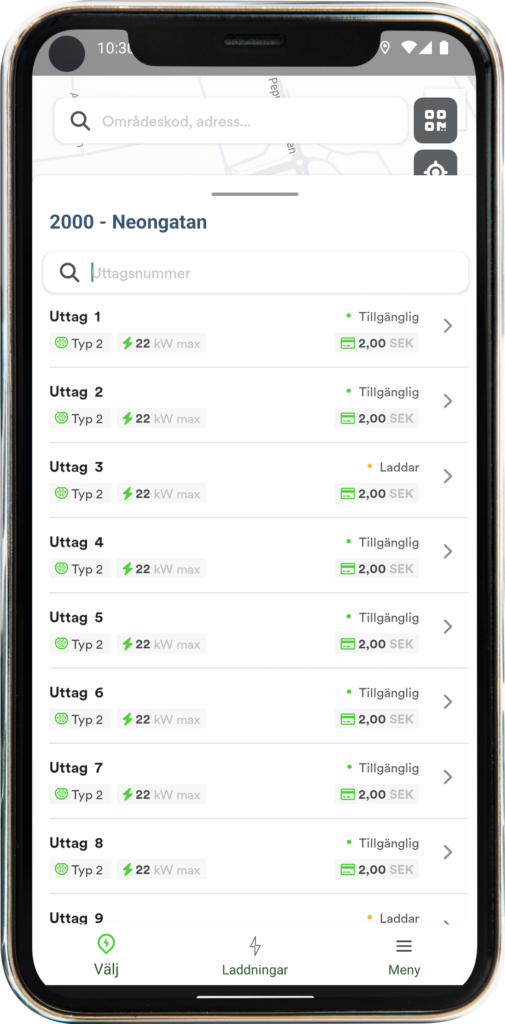
Select the outlet where you are parked.
Once you have scanned the QR code, you will automatically be taken to the next step.
Fill in when you are leaving. We prioritize your charge according to your departure time.
If you are staying longer than 24 hours, click on Today at and select the date you are leaving.
This function, to set the departure time, is currently not available for charging stations. We are working to solve this shortly. It works well to charge anyway.
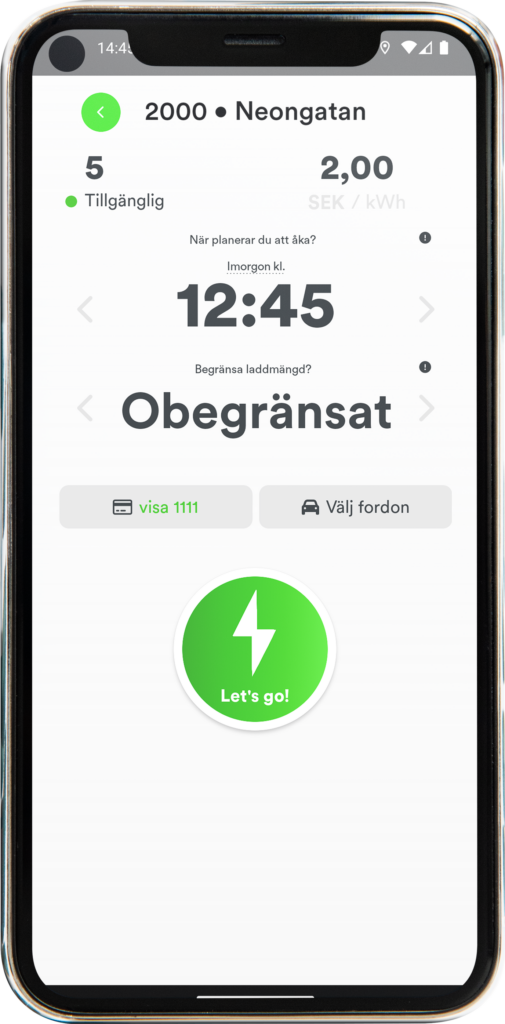
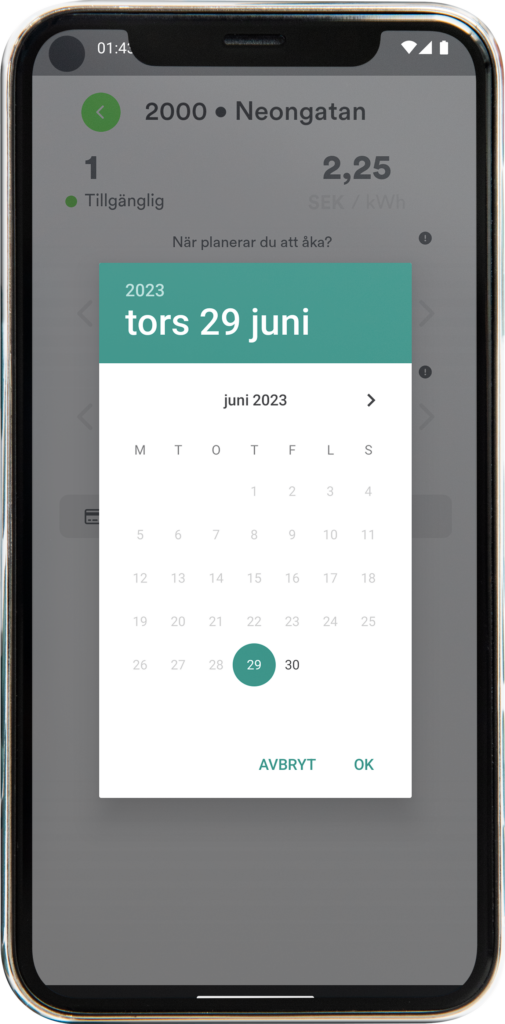
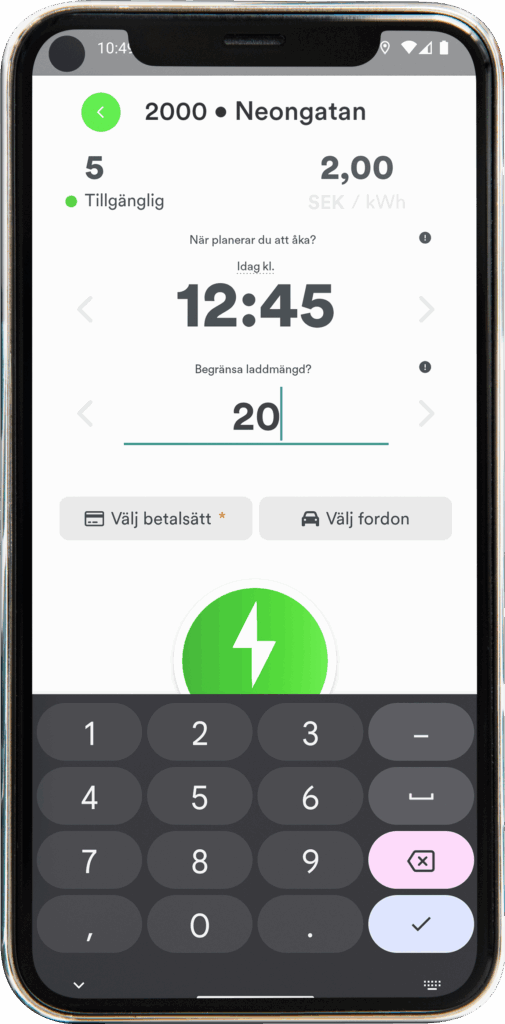
If you don’t want to charge fully, you can choose how many kWh you want to charge.
Press Unlimited or use the arrows to select how many kWh you want. If you choose Unlimited, we charge until the car is fully charged or the departure time has passed.
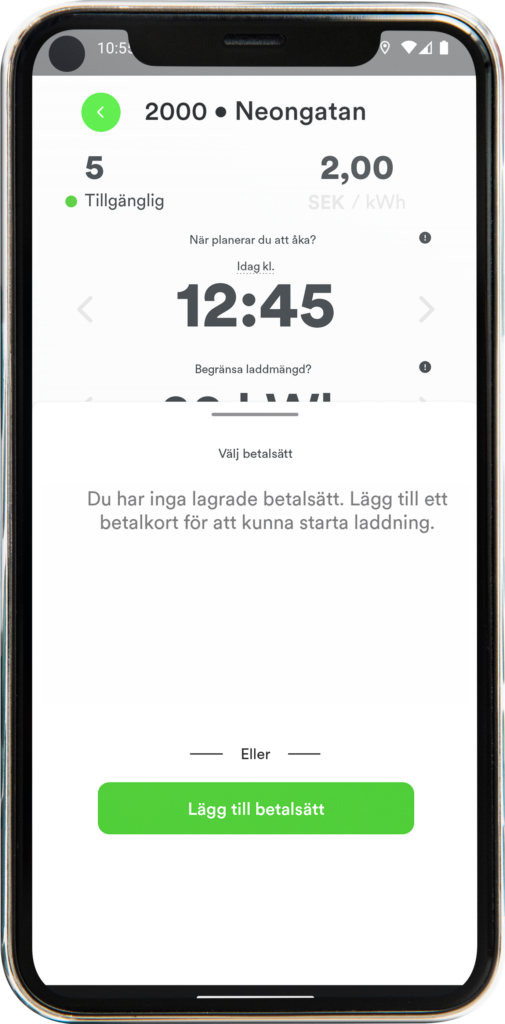
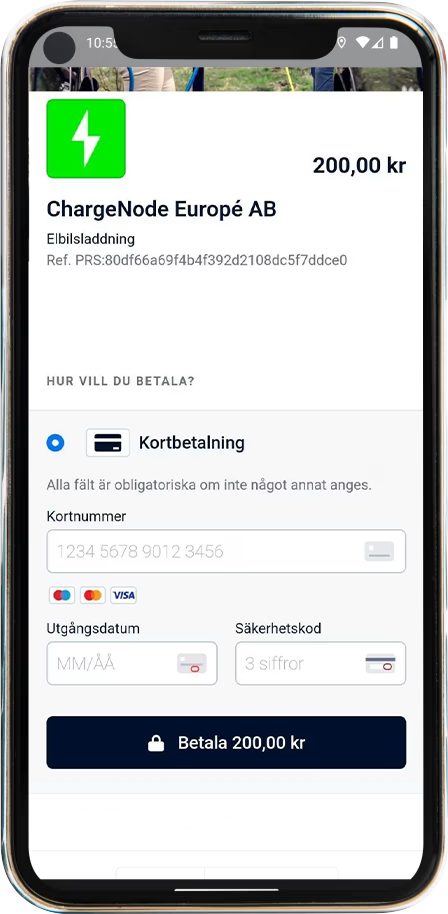
Click on the Add payment method button and fill in your card details.
We will keep your card details on file and will debit you on the 28th of each month. Once the card is stored, it will appear in the list. Tap the card to select it as a payment method.
The card must be open for online purchases.
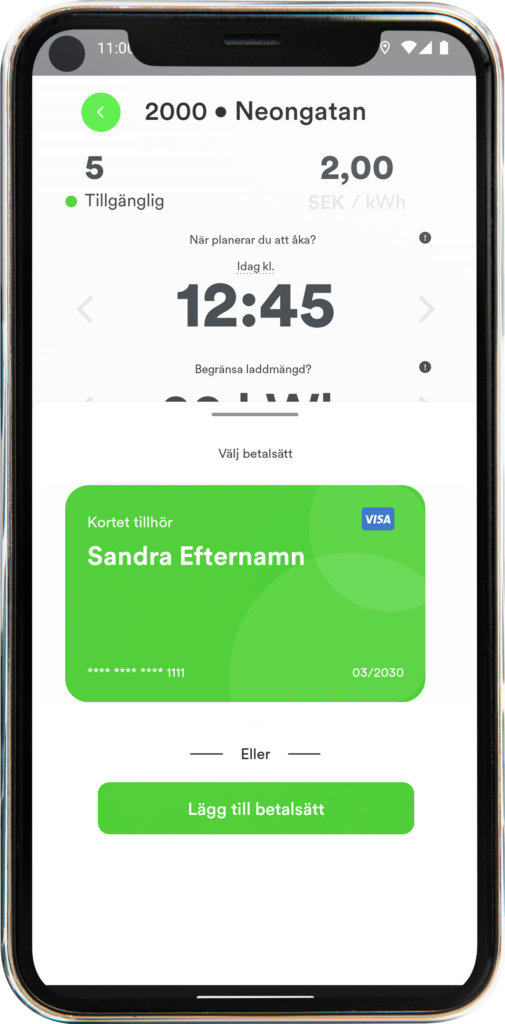
Start charging by tapping Let’s go!
Then we will start charging and you will receive information in the app.

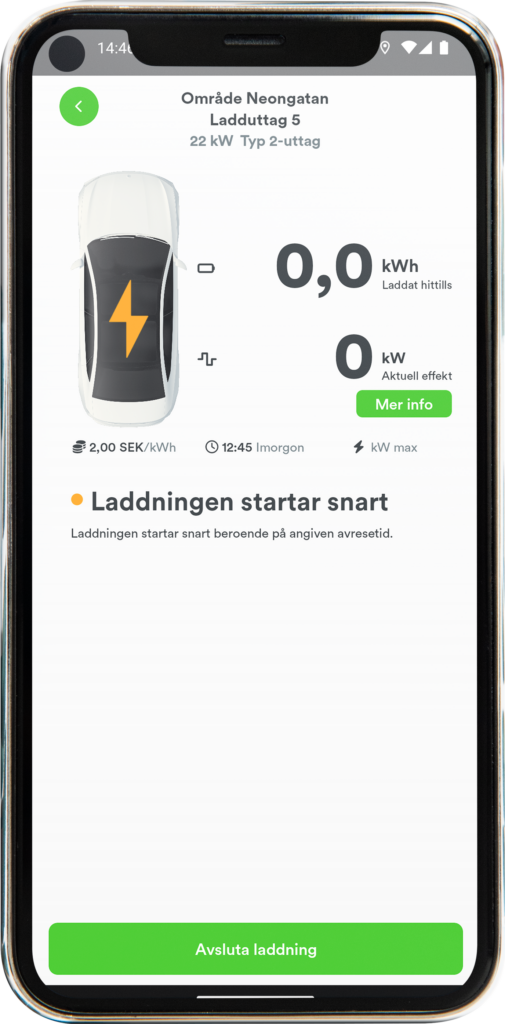
If your vehicle has its own app (e.g. Tesla) you will keep getting push notices saying that charging has been stopped, even though the desired charge has not been reached.
You can disregard this information. If you want status updates on the desired charge, it’s available in the ChargeNodes app.
ChargeNode integrates the payment solution with many leasing companies such as Ziklo Bank, Autoplan, Leaseplan, Bilreda and others.
We can integrate with your own business-critical financial and operational monitoring systems to make charging an integral part of your business with minimal administration.
Advanced troubleshooting and remediation.
If you prefer digital contact with us over the phone – no problem, we offer automated support via our AI bot on the website.
Web-based help center with instructive videos and texts explaining how our portal and app work.
Personalized service around the clock.
Personalized service around the clock.
We offer different levels of service based on your needs.
Collect all your charges on a single invoice with our business account. Convenient for those with pool or staff cars.
Public charging points with a power above 50kW must offer payment with a physical payment terminal. We offer a pre-integrated payment terminal through our partner Adyen – pre-configured with our intuitive interface for selecting charging outlets and charging status.
Want to use your own app? We offer integration with other apps via the industry-standard OCPI protocol.
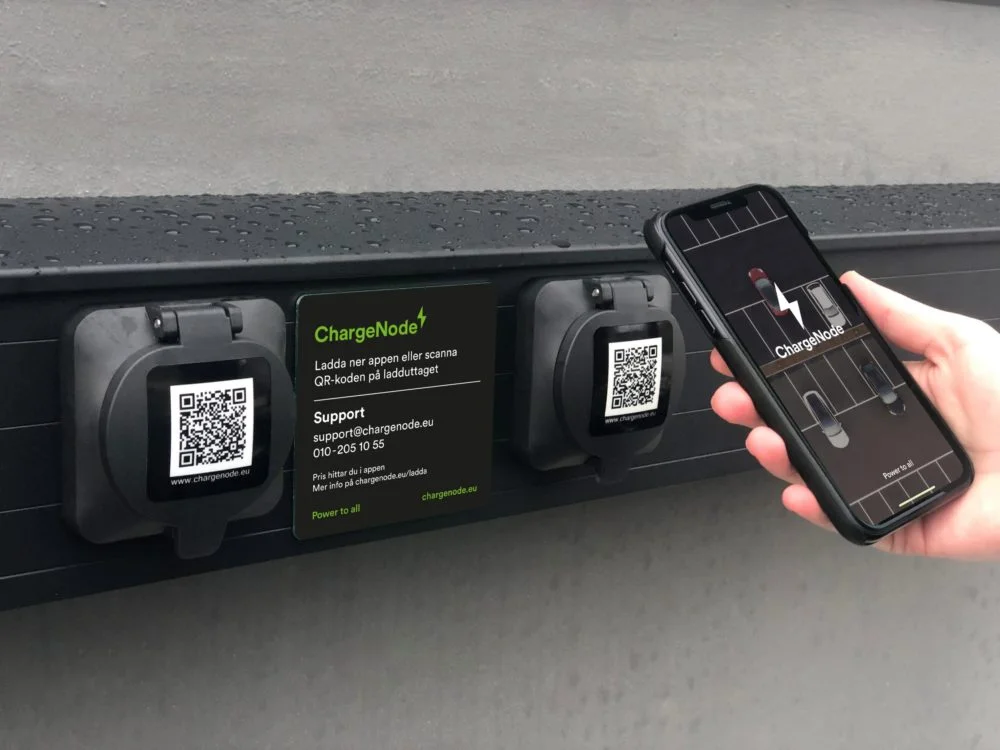
Pay without an app by scanning the QR code on the charging socket and entering payment card information. Support for ApplePay/GooglePay makes this an easy and attractive option for infrequent shoppers such as passing tourists.
As a charging customer, you always have free access to the ChargeNode mobile app for iOS and Android. Here you can easily activate charging, see a map view of ChargeNode’s public charging points and receive ongoing information about charging status. Here we can also provide information and help with the service. If your company is connected to ChargeNode, you can easily switch between private and business charging. You can also easily charge without the app via an assigned RFID tag.


Charge easily with ApplePay/GooglePay!
Fast, secure and contactless – choose Apple Pay or Google Pay at checkout for an easier payment experience, directly from your mobile.
Export of all session data and history for import into a separate BI tool.
Access to all invoices and invoice specifications as downloadable pdf.
In our portal, you can easily view and update the price for your area. You choose how you want to control pricing – we offer three flexible options:
Fixed price
With a fixed price you set a specific price per kWh including VAT.
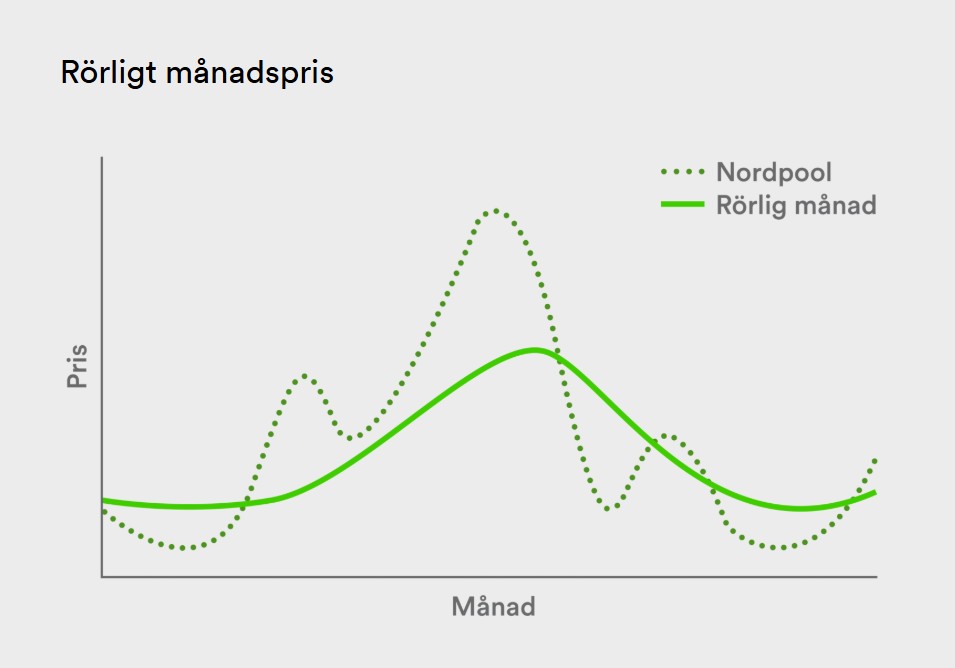
Variable Monthly Price
The Variable Monthly option follows the current Nord Pool price based on the electricity area you belong to.
Scheduled price
Scheduled price allows you to set different prices for different times of the day or different days of the week.
Easily manage who can access your charge points, create member groups and price discounts.
Our powerful dashboard gives you a complete overview of your charging facility – from energy consumption and power peaks to charging patterns and unique users. Visualize user data, identify areas for improvement and make smarter decisions based on real insights.

Connect sockets to a specific user profile to automatically start charging when the cable is plugged in.
Start and stop charging with RFID tag.
Direct connection to Nordpool for loading spot prices (of hourly and quarterly prices). Enables smart pricing models to maximize the profitability of your charging portfolio.
System support to support the loyal network owner or Svenska Kraftnät when needed.
Restart the charge points automatically in case of power failure (Hardware dependent)
Prioritize individual outlets for e.g. mission-critical operations such as pool cars, service cars to ensure that the cars are always prioritized for charging so that operations do not stop. When priority outlets are not active, available power is distributed to other outlets to constantly maximize the charging capacity of the entire system
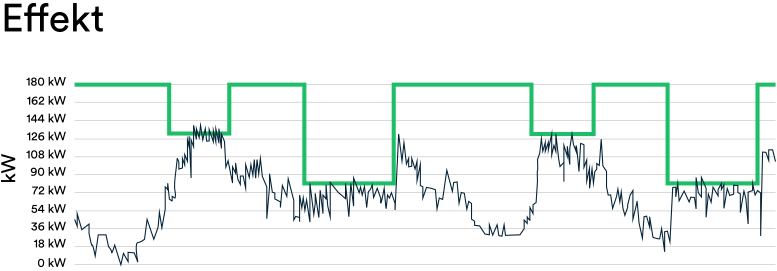
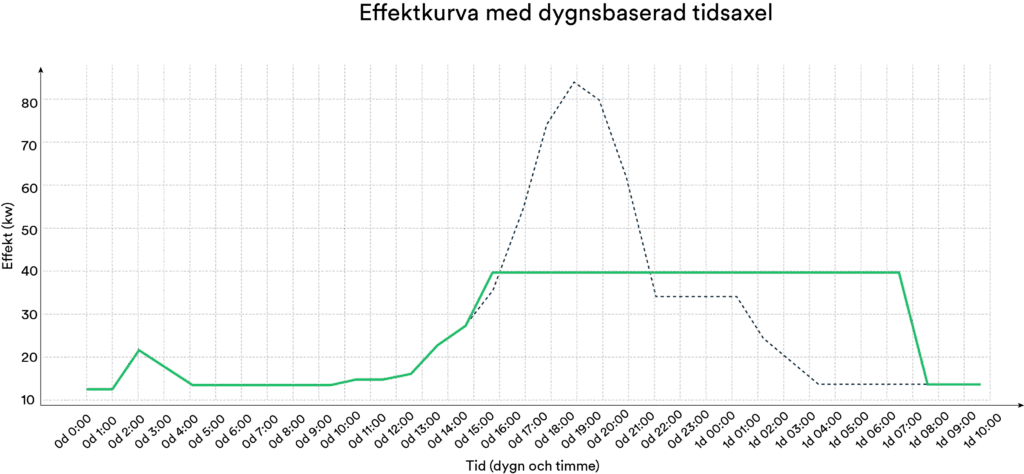
A dynamic power schedule gives you full control over the maximum power of your plant – adapted to the daily load and grid cost. The graph above shows how the schedule (green line) controls available power depending on time, while actual power use (black line) is safely within these limits.
Advantages of the power scheme:
The result: lower costs, more stable operation and more sustainable use of the electricity grid – perfect for homes, businesses and depot charging.
Charging all vehicles at full power at the same time is neither energy efficient nor economically sustainable. By instead prioritizing charging based on the vehicle’s departure time, we can use the available power in a smarter way – without leaving anyone with an empty battery.
Advantages of departure time controlled charging:
This type of dynamic control is particularly suitable for residential, commercial and depot charging – where vehicles are parked for a long time but do not need to be charged immediately.

Our backend load balances all OCPP compliant hardware to protect the property’s main fuse against overload and at the same time maximize the total power available for EV charging. We can load balance statically against a fixed power budget or dynamically, which means that the power budget for charging in real time relates to the property’s power consumption. We support both DLM (Dynamic load management) and ALM (Adaptive Load Management) standards.
With our intuitive alarm management module, you can keep track of the operational status of your charging infrastructure. It analyzes fault codes, automatically classifies alarms and suggests actions – so you can act quickly and efficiently.
Smarter service starts with the right insights – at the right time.

In addition, you monitor the charging points’ session data, see limits for e.g. uptime, automatically generate alarms and suggest action.
Our backend is integrated with an OCPI-compliant API that enables standardized and secure communication with other e-mobility systems and actors. This makes it easy to exchange data with external platforms – without exposing our entire infrastructure.
Advantages of our OCPI-API:
Our API is the obvious interface to create seamless charging across network boundaries – without compromising control or data security.
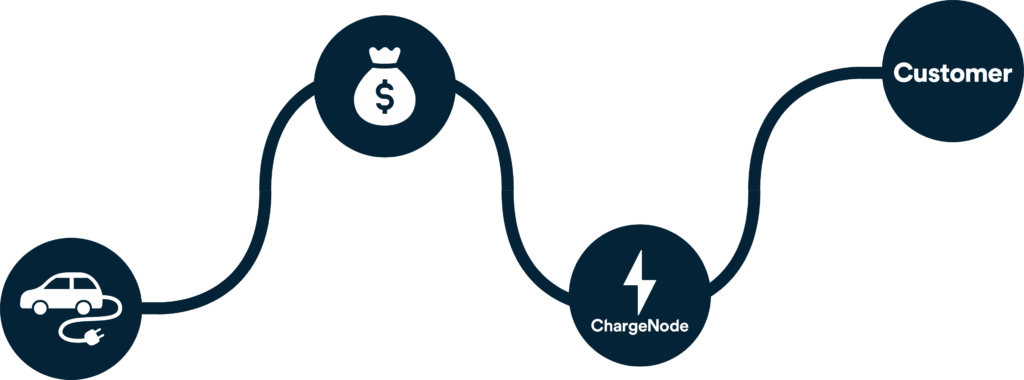
ChargeNode handles the payment with the charging customer and reimburses the facility owner via a self-invoice, completely without administration. All you need to do is post the invoice.
We have worked with almost all types of hardware and most brands of charging stations for many years. We have a deep understanding of how they work in operation and this is knowledge that we bring to every meeting and every decision. We have also developed our own hardware which, to put it mildly, is probably the best on the market.
Er anläggning driftsätts i vår portal och ni får tillgång till er kundportal. Vårt Customer Success-team står redo att erbjuda utbildning i portalen om så önskas. Under hela avtalstiden garanterar vi laddkunder support 24/7, 365 dagar om året. Vi är alltid tillgängliga via telefon för att hjälpa.
Vi har jobbat med nästan alla typer av hårdvara och de flesta märken på laddboxar i många år. Vi har en djup förståelse för hur de funkar i drift och detta är kunskap som vi tar med oss i varje möte och varje beslut. Vi har dessutom utvecklat en egen hårdvara som, om man ska sticka ut hakan lite, troligtvis är den bästa på marknaden.
